Sharing Simulink Plug-ins for CarMaker without sharing the actual Simulink model
Frage
Sometimes a Simulink Plug-in for CarMaker needs to be sent to other people working on the same project (e.g. project partners from different organizations), but it is not desired to share the Simulink model itself. Is it possible to share the Plug-in without sharing the Simulink model itself?
Antwort
To illustrate the procedure, the example model UserBrake_RTW.slx which is included with the CarMaker installation is going to be used.
First, lets start with some background information. Anytime a Simulink Plug-in is built, the follwing changes occur:
- In the src folder a new folder with the name of the Plug-in followed by _CarMaker_rtw is created. In this case: UserBrake_RTW_CarMaker_rtw (Image 1)
- The folder UserBrake_RTW_CarMaker_rtw contains the C-code files for the Plug-in (Image 2). For this use case, the one needed is the header file (ending in wrap.h): UserBrake_RTW_wrap.h (Image 2)
- A library file libUserBrake_RTW_win64.a is created (Image 1)
- In the Makefile the object of the model is included (Image 3) and in the User.c file the model is registered and the wrap.h file is included (Image 4)
- The Plug-in model is added to the list of available Plug-ins. This list can be found in a file named PlugIns inside the CarMaker project folder in Data > Config.
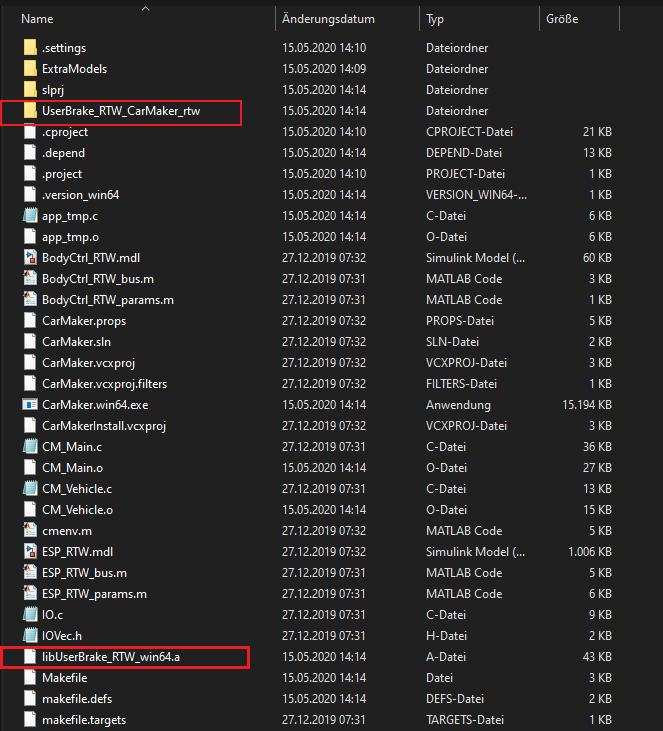
Image 1. Contents of the src folder.
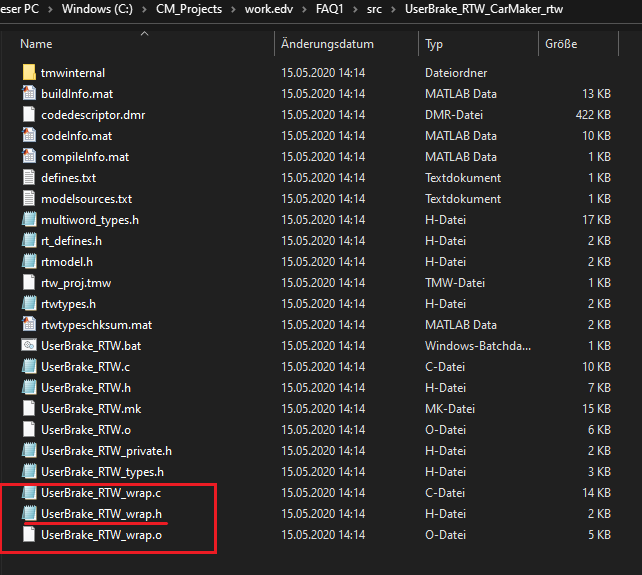
Image 2. Plug-In C-Code files
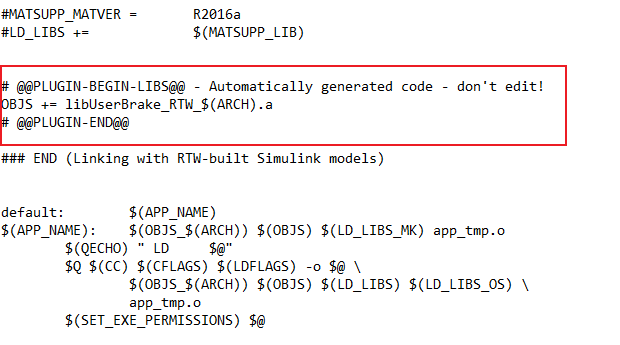
Image 3. Changes in Makefile
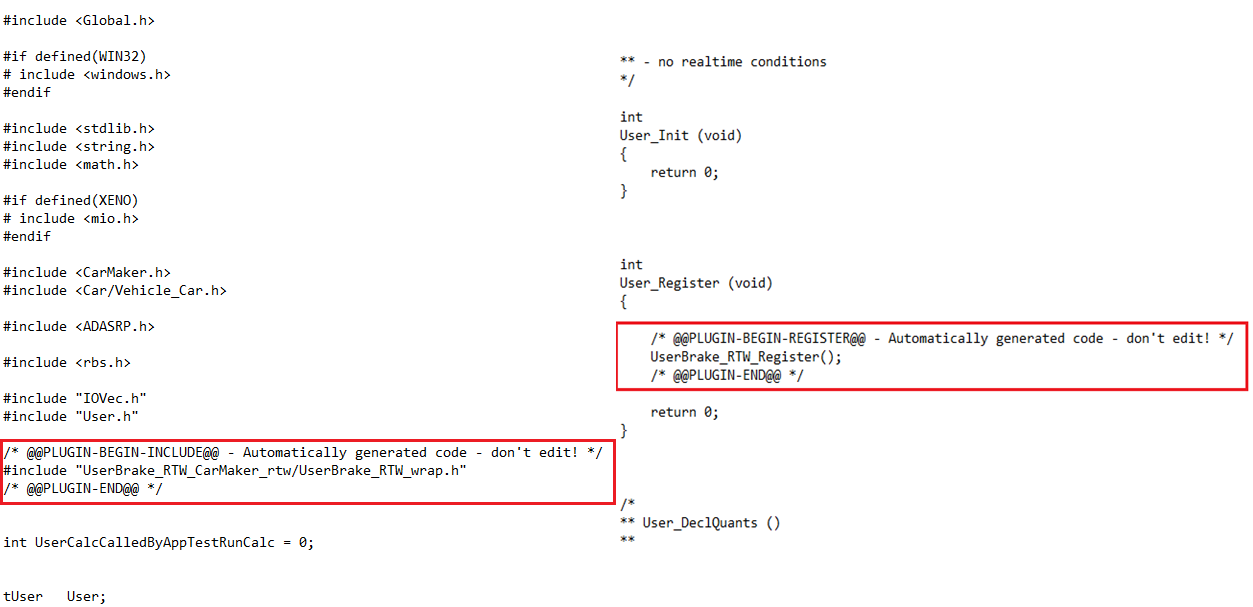 Image 4. Changes in User.c
In order to use a compiled Plug-in model for the simulation in CarMaker, the Simulink model file (.mdl / .slx) is not needed.
Instead, you just need the following files:
- The PlugIns file that can be found under Data > Config.
- The wrap.h C-Code file (in this case UserBrake_RTW_wrap.h)
- The compiled library, e.g. libUserBrake_RTW_win64.a
After receiving these files, the following steps are necessary to integrate the model into a different CarMaker project.
Project at end user side:
- In the end user's project, the changes that appear in User.c and the Makefile (Images 3 and 4) need to be integrated. The names for the Plug-in must be exactly the same as in the original project.
- The relevant entries from the PlugIns file need to be copied into the local PlugIns file. If there is no PlugIns file, you can just copy the whole file into the Config folder.
- A new folder named UserBrake_RTW_CarMaker_rtw needs to be created in the source folder ('src") and inside it, the file named UserBrake_RTW_wrap.h has to be copied.
- The libUserBrake_RTW_win64.a has to be copied inside the source folder.
After the files have been copied and the necessary changes have been implemented, the end user needs to build the project. To do so, use msys to navigate to the source folder and perform the command make (Image 5). Alternatively, the project can be built using Visual Studio. If there are no errors, start the new executable from the CarMaker main GUI (Image 6) and the Plug-in model will be available for simulation.

Image 5. Performing the make command

Image 6. Connection to the new executable
- Datum: 15.05.2020
- Produkt: CarMaker
- Version: 8.1
- Komponente: CM4SL
- Sprache: Englisch
Tags
CarMaker for SimulinkMatlab/Simulink
Plug-in
Data Exchange